How to wire a light switch: A detailed step by step guide
Table of Contents
Introduction
Once in a while we all get stuck in a tricky/problematic situation when we are in a hurry or in need to urgently repair a light switch, but Either the electrician isn’t picking up the call or he is so busy that you have to wait for one day or two. Don’t worry wiring a light switch isn’t rocket science it’s a pretty basic skill and every MAN should know it.
Your age doesn’t matter to learn something new. Here is the complete step-by-step guide to replace your old/faulty switch.
!! SAFETY INSTRUCTION !!
!! Working with high-voltage electricity can be life-threatening if safety measures are ignored !!
- Wear rubber-insulated boots while working with high-voltage electricity.
- Use a wire stripper to strip the wires (if needed).
- Switch off the main breaker of your house.
- Use non-contact voltage detectors. (we have a way around if you don’t have one)
- If you are an amateur/inexperienced person always work under a person’s supervision.
Understanding how your wiring to the light switch works
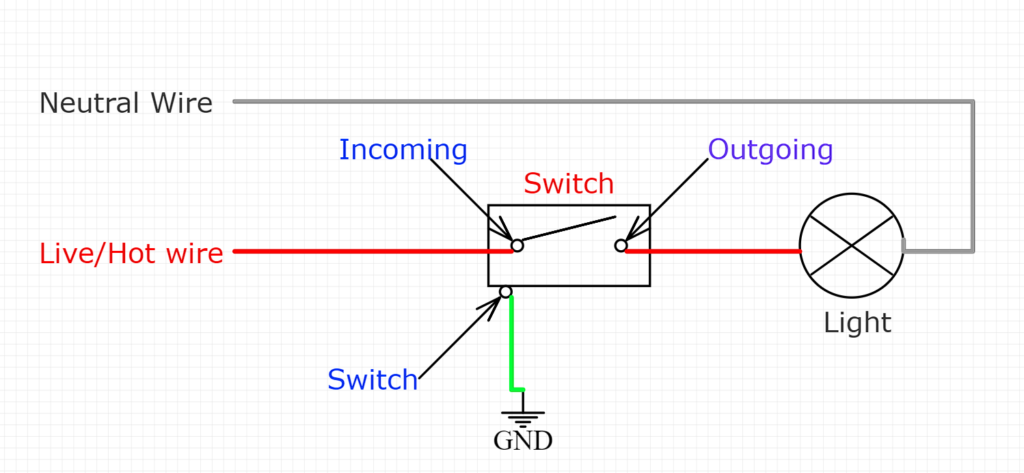
In the above image, the wiring diagram of a light switch is shown.
Hot wire:- The red wire is called the Live of HOT wire, this hot wire can be colored differently depending on your country, If you are in the USA it will be mainly of four colors, RED, BLUE, YELLOW, or BLACK
Neutral wire: The Grey wire is called the neutral wire( you may or may not see this wire in the switch box) it can be Grey or White in the USA.
Ground wire: In the USA you may also see a third wire typically a ground wire which can be colored GREEN, GREEN WITH YELLOW STRIPS, or a BARE wire.
So here is how it works. The electricity comes through the hot wire first it goes through the switch then to the bulb and returns through the neutral wire. For more clarity you can understand it through the water flow system, water comes through hot pipe(wire) first it goes through the valve (switch) then it goes through the turbine(light bulb) and returns to the tank again through neutral pipe(wire).
Ok, now you know how it works Go switch off your Main Switch/breaker of the house, if you don’t know just switch off all the breakers and let’s do the wiring/replacement.
Remove Face Plate
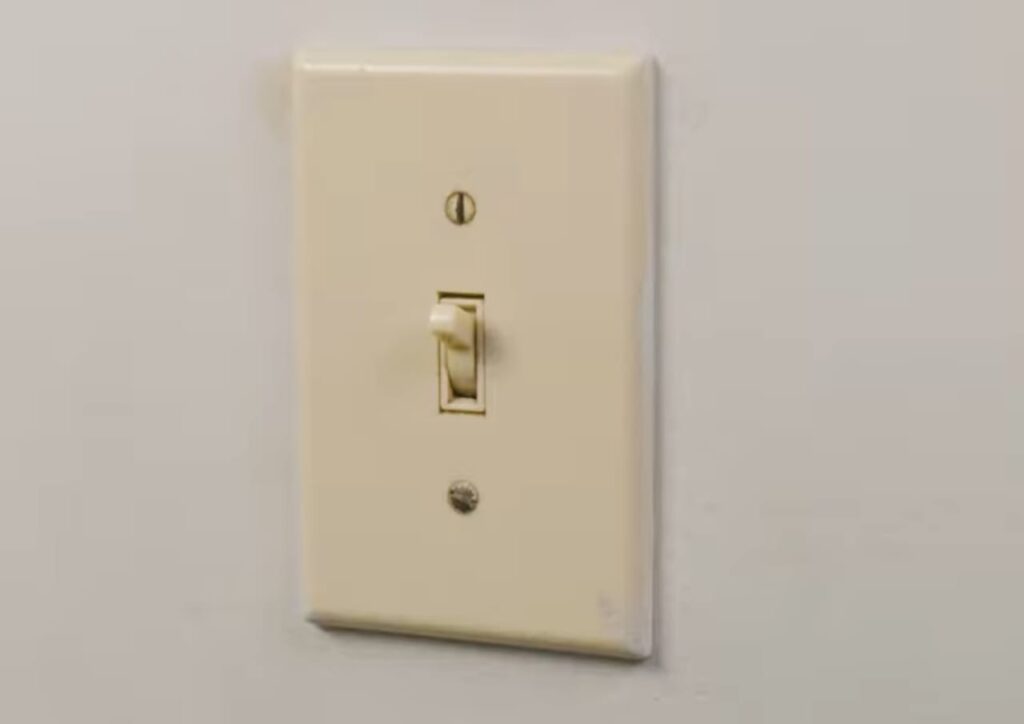
You see those two screws on the cover of the switch, unscrew them and keep them aside, (don’t lose them). Now the faceplate should come off directly in case if it doesn’t you can struck your screwdriver around it a little(not too much) to loosen any paint or putty holding it with the wall.
Taking out the old switch
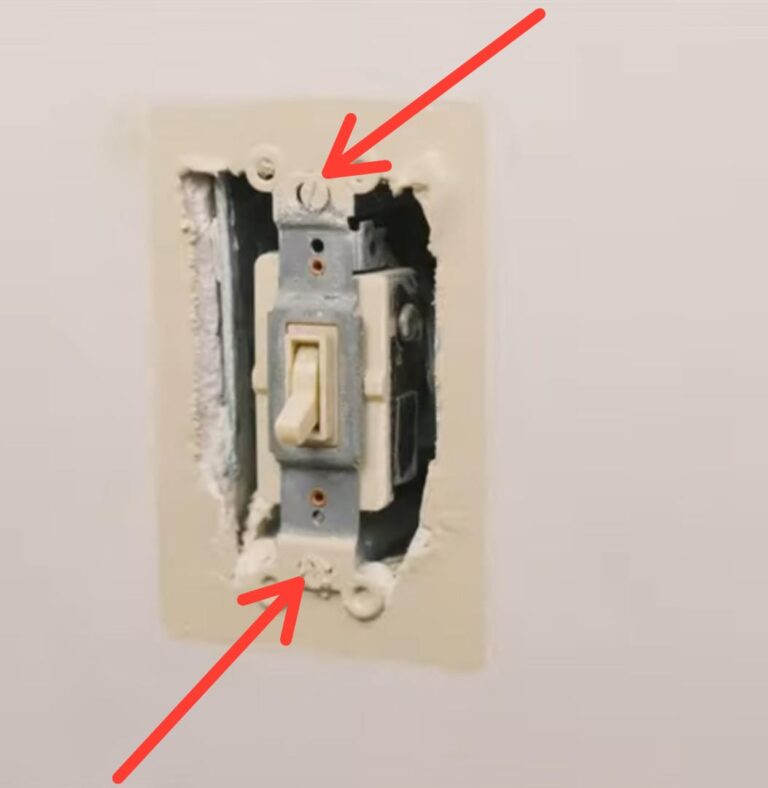
After removing the face plate you should see the wires and the switch body, Simply take your screwdriver and unscrew the two screws holding the switch.
Now this is one place where If you have the voltage detector use it to see if there is any live electricity running through any of those wires in the assembly. Usually, if your main switch is working and is Switched OFF you shouldn’t get any shock. But if you’re still unsure just use a proper insulated screwdriver and try not to touch any bare wires.
Removing old connection
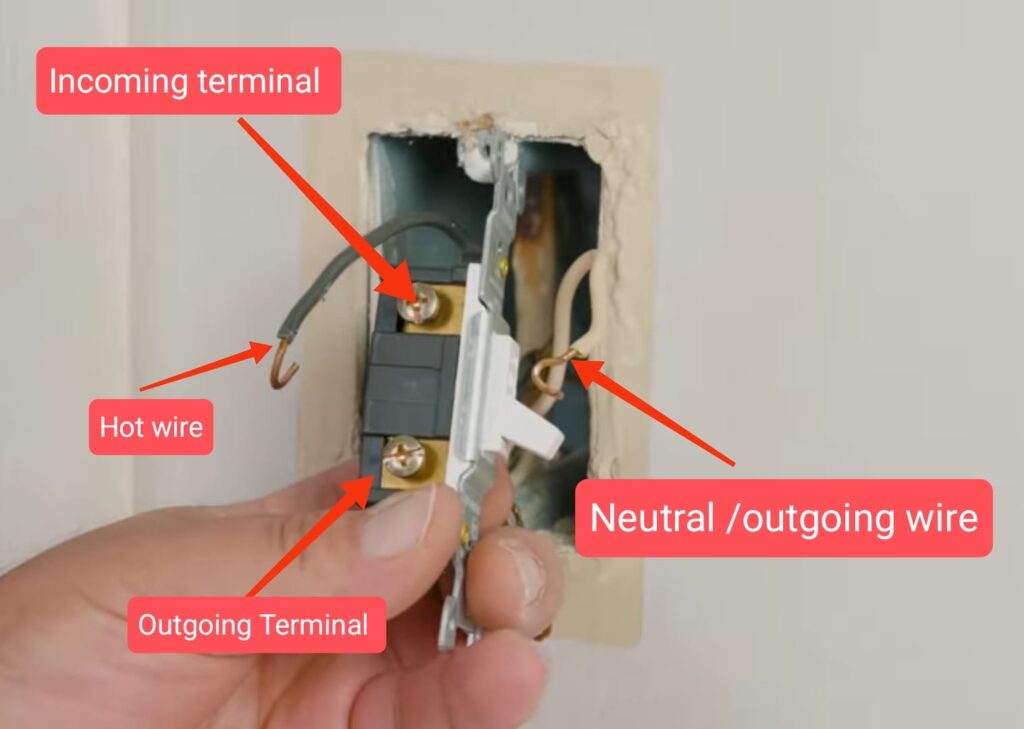
Now depending on your location and the old wiring, you may see 2 or 3 wires coming out of a switch.
If there are only two wires to the switch one is incoming and the other is outgoing remember the positions of them in the switch or click a picture of it in your smartphone so you don’t forget which is which.
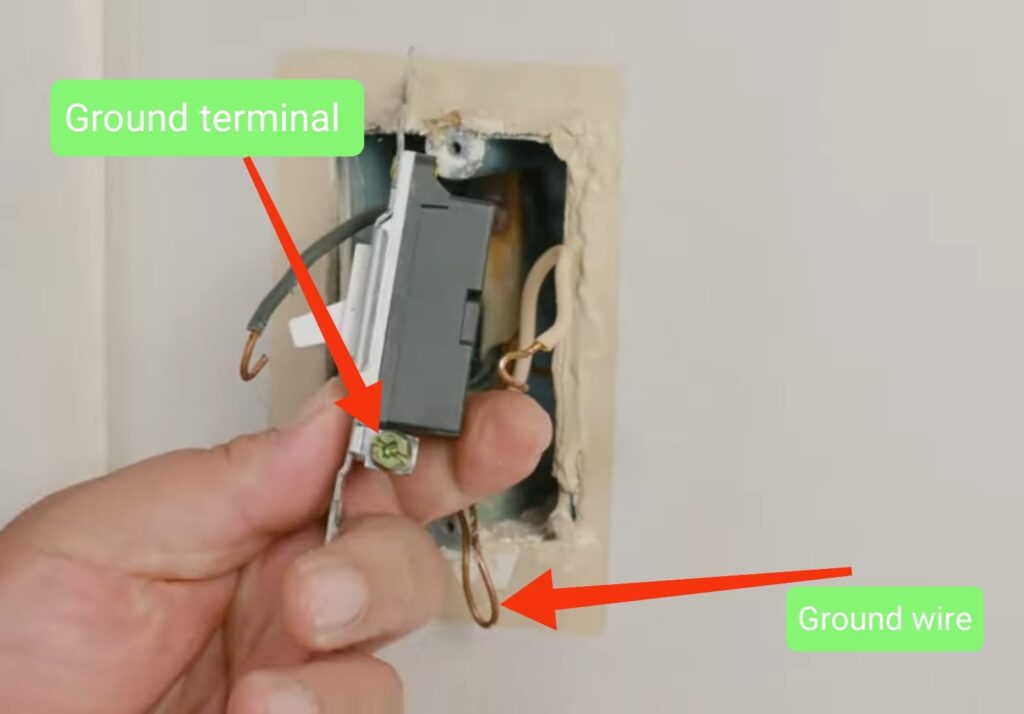
If there are three wires, the third one usually goes nowhere after the switch it just connects to the metal plate of the switch you have (if you buy a new switch you may see 3 connections). Disconnect all the old connections.
Photos are provided for a better understanding.
Connecting new switch
Hold the switch in the right direction (If the switch is toggled down it reads”off”) Connect the hot wire to the incoming terminal and the neutral wire to the outgoing terminal (Don’t worry if you are still not sure which one is incoming or outgoing just be careful you don’t connect any of incoming or outgoing wires to the ground terminal of the switch). The ground terminal is the one that is connected to the body of the switch or the metal plate of the switch. And ground wire(green or green with yellow stripes, or bare wire) to the ground terminal (if you have one).
Putting everything back together
Now once every wire is connected, put everything back together as it was before. Screw the switch then the faceplate back to the wall and go Switch ON Main Switch/Breaker of the house
Trouble shooting
Q. The switch is working but it’s function is inversed/reversed
Solution: See if you connected the switch the right way “If toggle down it reads “off” “. If the switch position is correct then you may want to interchange the incoming and outgoing connections to the switch and you will be good to go.
Q. I did everything accordingly but the light is not turning on
Solution: If you did everything correctly and the light is still not turning on the problem may lie in the light itself, if the light is working fine in other holders then the wiring might be damaged, you need a professional electrician for that.
Q. My GFCI breaker pops as soon as I switch on the main breaker.
Solution: You may have connected the hot wire to the ground terminal of the switch, go change it back.
For more content check our our categories search on youtube for tutorials
